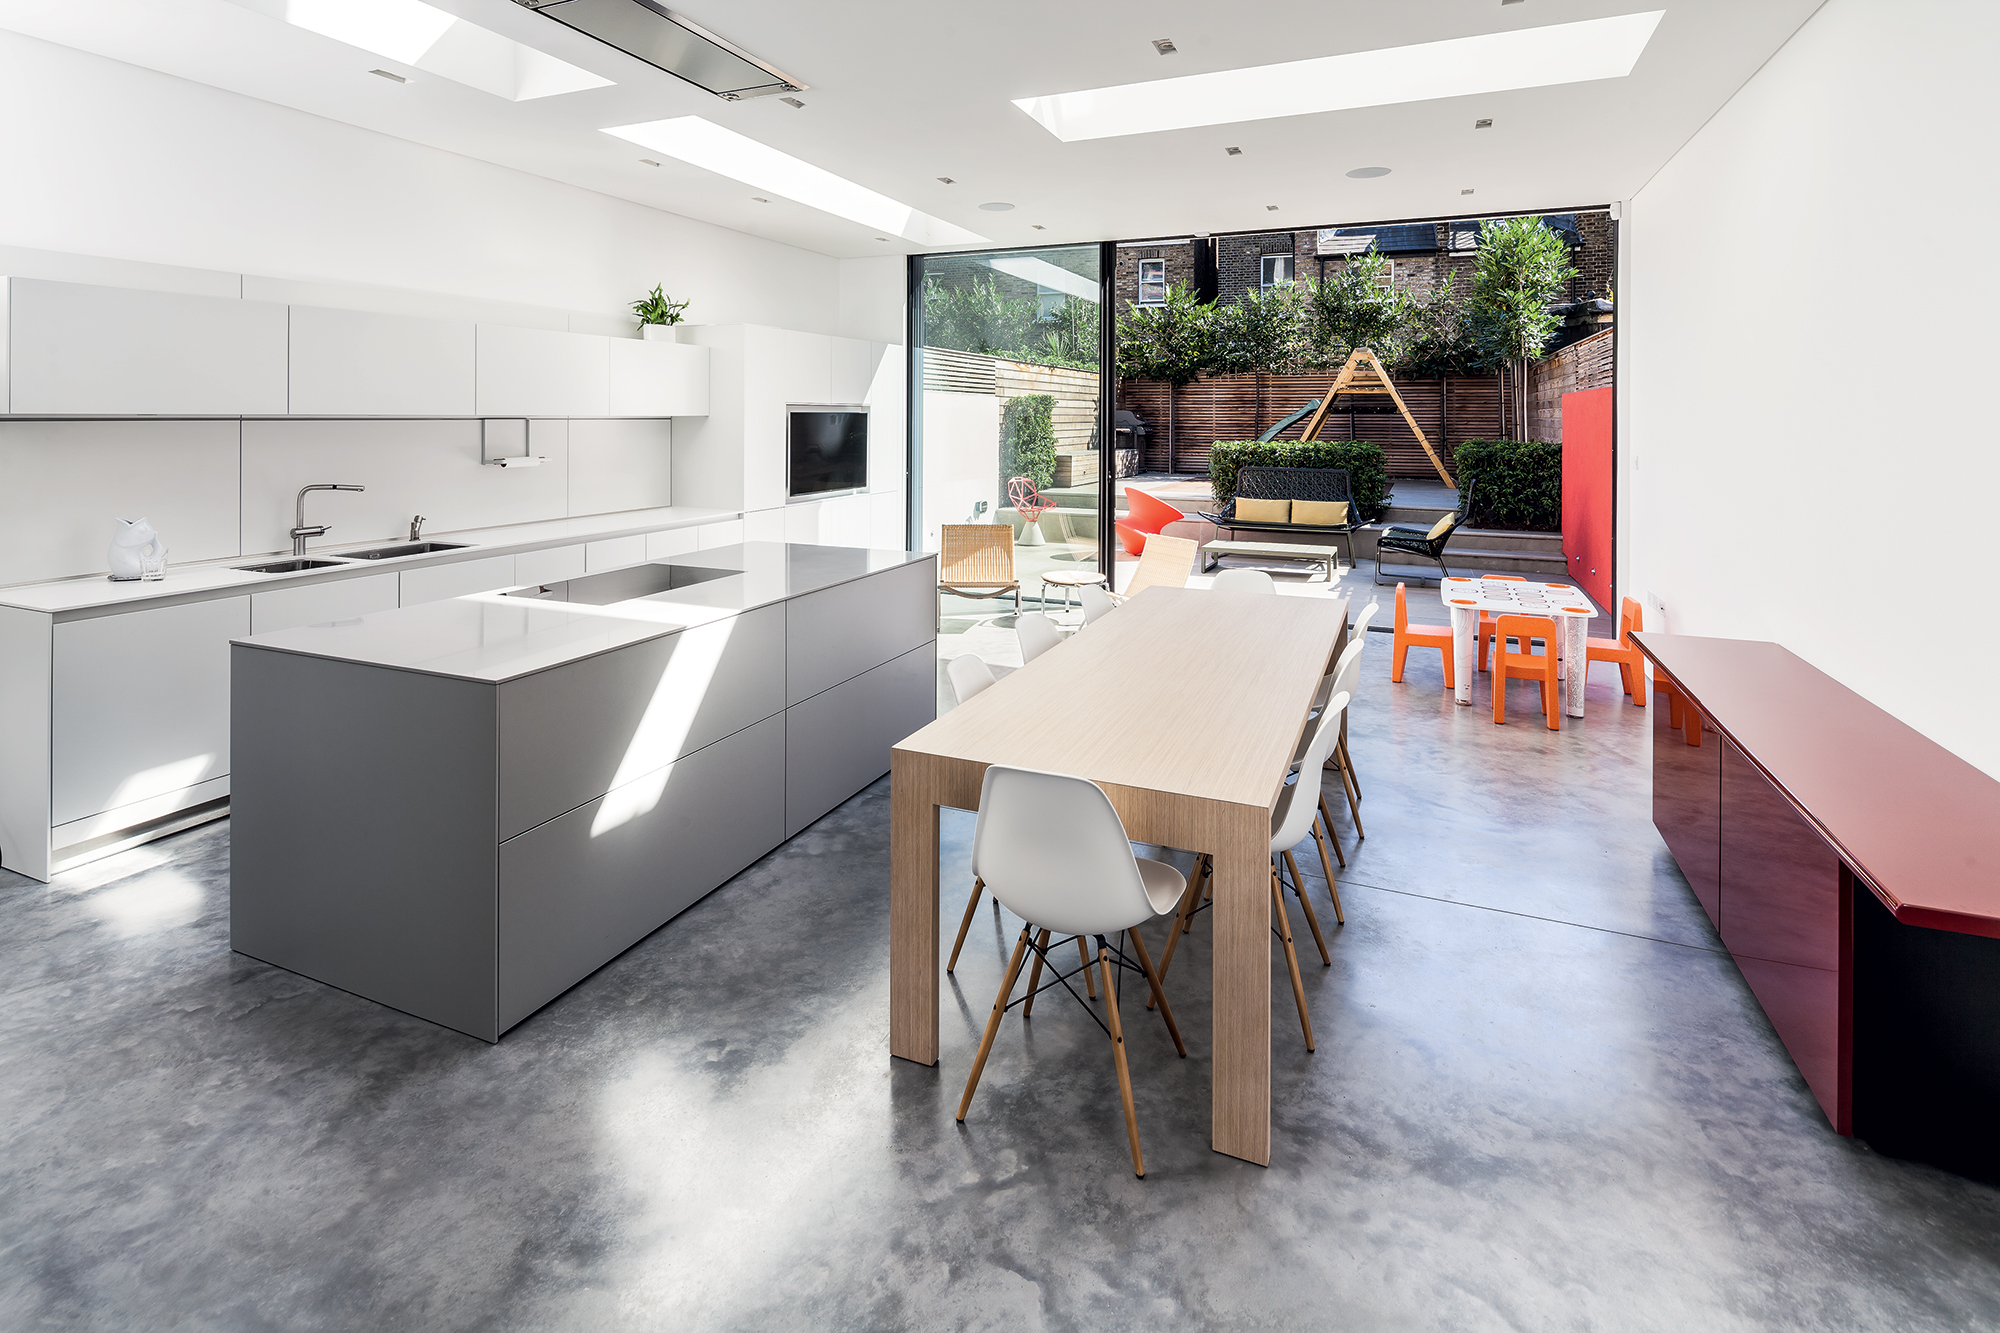
With the popularity of the industrial design trend firmly established, it’s no wonder materials that were originally cast on the factory floor – literally – are now being adopted in the home.
Polished concrete flooring is a sleek and stylish, yet hardwearing and low maintenance covering. So it really is a solid solution for a self build or renovation project.
Benefits of polished concrete
If you want a low maintenance, stone-style appearance then polished concrete could be ideal. It can create a similar look to luxury materials such as granite and marble, while potentially saving you money on the hefty price tag.
Polished concrete typically costs anything from £80 per m2 to £150 per m2. This puts it in the same bracket as high-end stone floorings. But you won’t have to worry about the cost of screeding the floor first.
The material also works well with that self build staple, underfloor heating (UFH). This is because it is a good conductor and will retain the heat produced.
It even stores warmth acquired from solar gain (through windows etc) and recycles it as internal temperatures cool – helping to maintain an even climate. You can also choose from a range of colours and textures to complement your interior scheme.
Where can it be used?
Polished concrete floors are ideal for creating a seamless link between inside and out, especially when connecting a kitchen-diner with the garden. The light-reflective and robust material holds up well in high traffic areas, which is why you’ll find it on many shop floors.
Depending on its condition, it may be possible to polish existing concrete. This is common in basement conversions or when transforming warehouses and industrial structures.
It’s generally easiest to install polished concrete flooring in a new build project. This is because you can more easily plan for an arrangement that supports the weight of the material.
However, a retrofitting scenario is also possible. When applying concrete retrospectively you will need to consider whether the floor structure can take the extra weight (around 200kg per m2). You should also allow for the fact that the ceiling height within an existing property will be reduced by a least 100mm.
Installing polished concrete floors
Concrete is made by combining cement, gravel, sand and water. The mixture is then usually poured onto a steel and fibre-reinforced mesh, which minimises the risk of cracking.
If you’re fitting underfloor heating, the concrete should be installed on top of the pipes. Either way, it will then be levelled and compacted using internal or external vibration. This will remove any air pockets and surface voids, which could otherwise reduce the strength and durability of the material.
Depending on your desired finish, a plain or coloured hardener (known as a dry shaker) is added to the concrete’s surface. This is smoothed using a power float machine featuring a large, round flat disc for rough grinding the concrete. The job can be repeated between four to eight times to achieve the desired effect.
Case study: Modern Renovation & Extension of a Victorian Home
In order to achieve the contemporary look they were after, Stephen and Laura specified polished concrete flooring – and they’re delighted with the result. “We could have gone for a slightly cheaper covering, but we didn’t want to compromise on materials in this area of the house,” says Stephen. “It’s not so much the concrete we love, but the absence of joints. You just wouldn’t get the same look with tiles, so I’m pleased with our decision.” As well as the striking aesthetic this seamless surface creates, the flooring is an excellent partner for the underfloor heating that has been laid throughout the house. It’s highly-efficient in terms of its thermal mass. |
Treatment should start when the concrete is hard enough to hold the weight of the machine and operator. However, it should not be so dry that the power floater cannot trim the high spots or fill the lows effectively.
Most polished concrete floors are cast in one section, temporarily covered and left to cure. This process will be much faster in the warmer months.
After a month the concrete is uncovered, cleaned, mopped and burnished to remove any inconsistencies or footprints. At this point some companies will simply apply a matt, satin or gloss sealant to achieve the desired appearance.
Technically a true polished concrete floor is finished using a diamond grinding machine that evens out the surface. The floor is then treated with a chemical densifier to reveal a blemish-free shine. It is not considered polished concrete until a level of 400 grits is reached to achieve a glossy finish.
What to consider
At least 28 days must pass before freshly poured concrete can be polished. However, works such as kitchen installations can continue. It will be 6-12 months before the concrete reaches full strength, but the floor will be usable much sooner.
Sudden temperature change is the biggest reason for cracks in floors. Laying a reinforcing mesh before the concrete pour will help minimise this.
In addition, control joints are usually cut into the concrete surface at predetermined locations. This creates a deliberate weak spot so the polished concrete will shrink (crack) in a neat straight line to look like tiles and avoid breaks elsewhere. The joints should be added with a neat saw within 24 hours of installing the concrete.
Photo: The owners of this terraced home in London wanted to establish a striking, yet low-maintenance space for their young family. Their project, designed by Architecture for London, involved adding polished concrete flooring, which runs from the living space straight out to the courtyard-style garden to offer a durable connection between indoors and out
The post Polished Concrete Floors Explained appeared first on Build It.
Article reference Polished Concrete Floors Explained

No comments:
Post a Comment