Let’s just go ahead and add this to the list of Things I Should Have Done Four Years Ago But Didn’t Because I Like My Life to Be Difficult and A Complete Disaster.
The thing is, this wall above the washer and dryer in the laundry room has been begging for shelving for a long time…
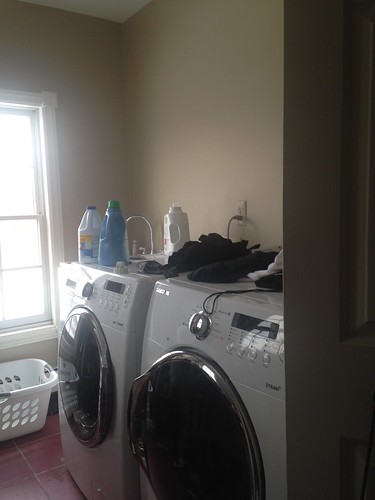
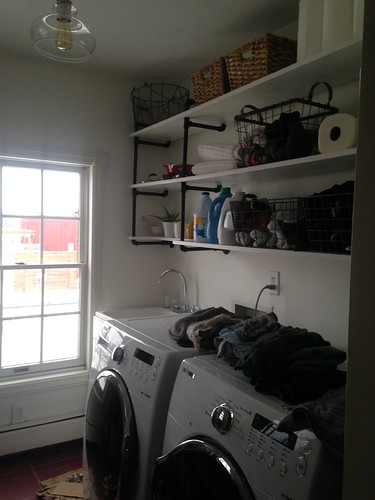
Look at this. WTF is going on there? Nothing. That’s what. And yet there’s typically laundry supplies and actual laundry all over the top of the washer and dryer and cleaning supplies and things like spare paper towels and gallons of paint (and maybe chicken feed) shoved under the counter. And all over the floor. And sometimes spilling out into the hallway.
Yep. That’s not hyperbole. It’s an effing mess, and at least half a dozen times over the last couple of years I’ve gone so far as to almost buy some standard wire shelving to put up there, you know, “temporarily” until I got around to really re-doing the laundry room. (So…never?) I mean, listen, I know myself well enough to know that a lot of times temporary means “uh, I’m probably never going to get around to this again, and yet every time I look at those cheap wire shelves they’re going to drive me nuts because I know I can build something better.”
So, that’s basically what has gone through my head every time I’ve done laundry for the last four years (and let’s be honest, that’s way fewer times than most other people would have done laundry in four years, but still…it gives me pause.) I’m trying to reign in my “if you give a mouse a cookie a girl a hammer” tendencies–like, hey, you know what would be a good idea? To finish the upstairs bathroom project I started over a year ago before tearing apart a perfectly good laundry room–but with a rapidly-approaching kitchen overhaul and the general state of disaster in the house, this shit could wait no longer…
So. Shelving. This is how it went down.
Remember when I built this closet in my last house?
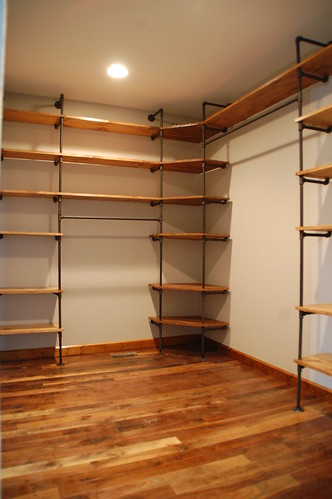
Actually…why the hell would anyone remember that? It’s been like 5 years, and I barely remember it. (I think I only got to use that closet for a month before I moved out. So. That.)
Still, it was a pretty awesome closet. I don’t love a lot of shelving brackets that are available these days, so I figured the laundry room was either going to need to be floating shelves (like these awesome ones that Sarah built in her laundry room, I’m jealous.) Or, the old standby a la the Memorial master closet… some gas pipe and wood.
Pipe shelves are a little bit of a pain in the ass to build (i.e. three trips to Lowe’s in two days to exchange and buy additional pipe fittings) but building floating shelves in a house that doesn’t have any square walls was going to be beyond the amount of patience I currently possess… so.
Let’s do this.
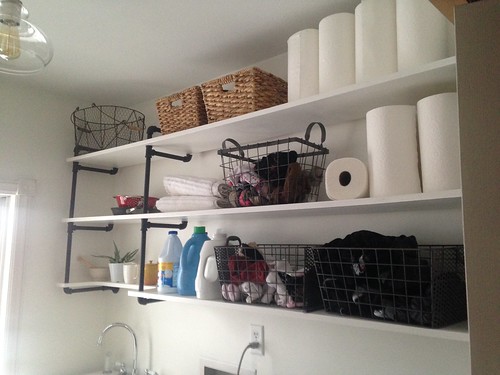
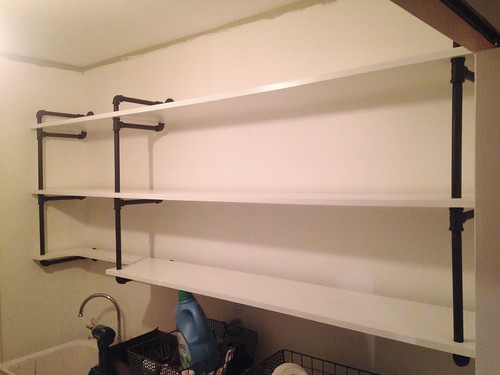
I used 12″ select pine boards (which means the surface area of the the shelves is about 11.5″ x 7′) but they come about 13″ off the wall, and– with 3 shelves– are 31″ tall.
This is what the final assembly looked like for the pipe pieces:
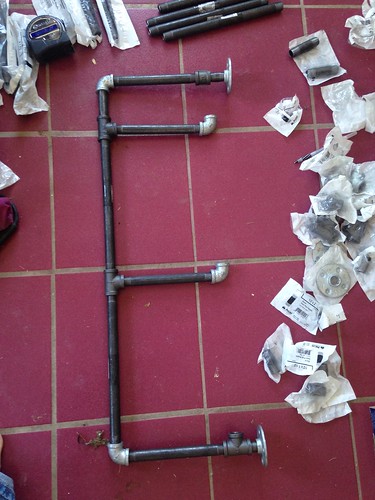
I used 3 of these assemblies, and each one consisted of:
- 4 – 90-degree elbows
- 3 – T connectors
- 2 – long pipes (length of the the space between shelves, mine were 12″)
- 3 – short pipes (length determined by the depth of the shelves, mine were 8″)
- 1 – very short pipe (to extend the front over the top of the top shelf, I used a 3″ fitting)
- 1 – straight connector, used at the top for spacing reasons (you could also use a longer pipe on the very top part of the assembly, but I used the connector to allow me to adjust the length a bit if needed)
- 1 – 1.5″ nipples
- 1 – nipple (smallest size available)
- 2 flanges
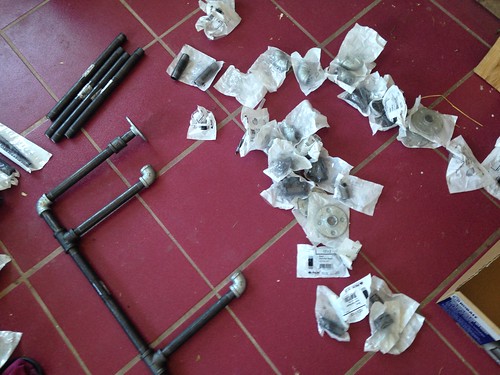
Definitely “dry fit” everything… this is where (if you’re me) you can expect multiple trips to Lowe’s until you have all the right parts in the right sizes.
Holes are drilled in the shelves to slide over the “front” of the assembly, and the back of each shelf rests on the top of the “back” fitting. The assembly is secured to the wall at the top and bottom with the flanges. (I’ve seen these built with flanges on every level and that’s probably overkill, plus I think it looks a little clunky.)
Here’s an example of how it starts to come together:
But that’s jumping ahead. Before I got to this point, here’s what I did:
- Spent a lot of time staring at the wall.
- Made some decisions about the spacing of the pipe assemblies.
- Washed all the pipe fittings, let them dry, and then spray painted them… in my not-ventilated basement, because I live dangerously.
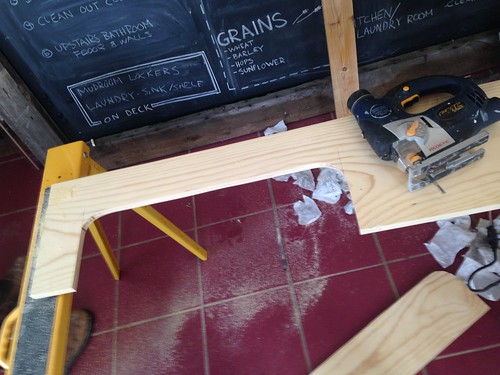
- Cut all the shelves down to length and sanded them.
- Drank a beer.
- Did stupid shit like this…
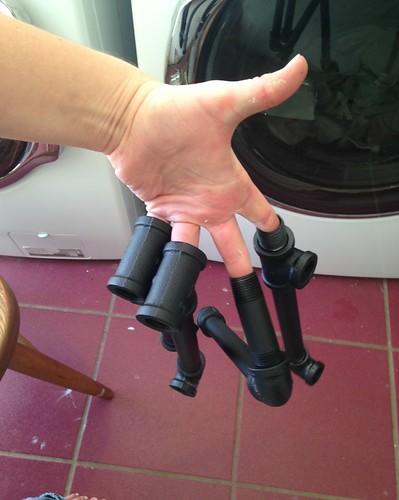
Edward Pipehands?
Anyway, in all of that fun I did make a decision about the area over the sink, which is that the bottom shelf needed to have a cut-out, so that I can still easily lift my water tote (used for hauling water out to the barn in winter) in and out of the sink easily…
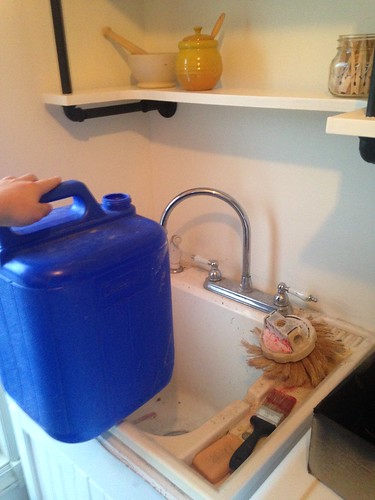
I like to make sure I create very precise and technically correct rounded corners when I lay out a cut like this… ha. No. Actually I just grab the nearest cylindrical object and trace it.
WORKS.
And, actually, in order to get the holes for the pipes to go through the boards in the right place I used my fallback build-as-you-go method. So I installed the first section of the assembly on the wall, then put the first board on top of it, marked where the holes should go, and then used that board as the template to mark the holes on the other 2.
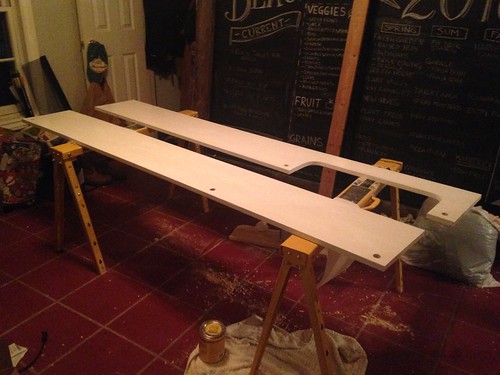
Then, paint. Every night for 3 days. Super fun.
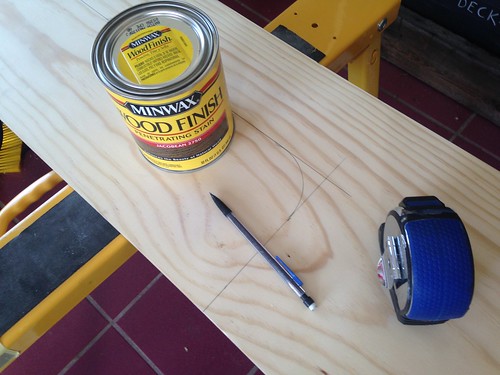
Pretty much every time you see shelves build like this, the boards are stained–in fact, I couldn’t find a picture of pipe shelves built with white boards on all of Pinterest, if you can effing believe that–and I actually bought stain to use for these as well, and then I made a game-time decision to go white. (Which actually required me to re-paint the laundry room for the second time that day. True story.) Honestly, I hadn’t really thought through how this room should look, but I do know I want to use a walnut butcher block as a counter over the washer/dryer and new utility sink, and having stained pine shelves and beautiful walnut on the same wall made me cringe a little.
So. White.
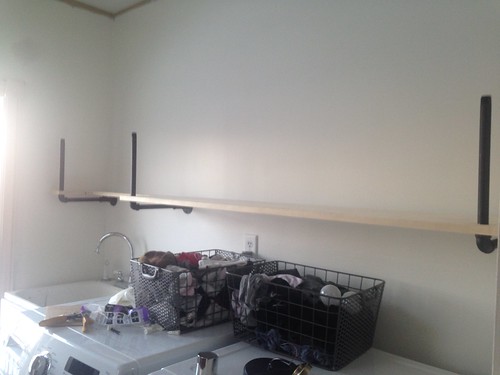
I actually don’t have a lot of feelings about how these shelves turned out, other than relief that I finally have a place to put things other than the top of the appliances or the floor. Maybe I’ll spring for some walnut boards for the shelves some day… when I don’t have a tractor payment anymore.
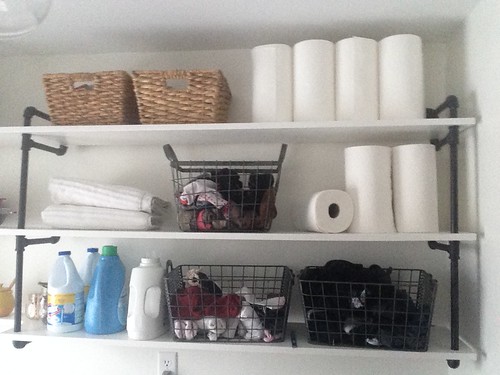
Here are a few weird things about my life/laundry situation: First, I keep all my clean socks and workout clothes in the laundry room. I’m always barefoot in the house, and the idea of hauling all my clean socks upstairs, and then inevitably needing to run back upstairs to get socks every time I want to leave the house (or switch into my workboots) is just ridiculous. Luckily the laundry room is right next to the mudroom, so this works well for me.
Same deal with my workout clothes. I always toss them into my gym bag right before I leave the house, and this makes my life so much easier.
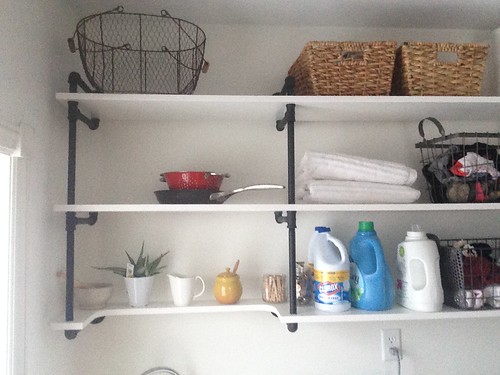
Since the laundry room is going to serve as my temporary kitchen here realsoon, and I’ve started cleaning the real kitchen out, the left side of these shelves is reserved for cookware and other kitchen-things. Good place for the foodstuffs… right next to the bleach.
Anyway. As far as finishing off the rest of the room, I have a bit more organization to take care of and a new utility sink that should be here in a week or two. I’d love to get the butcher block in before the big kitchen becomes unusable if I can. Then I won’t loop back around to this room until all that fab pink floor tile gets pulled up in here and the mudroom (when I have a working kitchen again, so… years? Ha. Haa..aaaacutally that’s not funny, knowing me it could really be years.)
My ultimate plan for this room includes a tile backsplash between the top of the appliances and the bottom shelves, and two floor-to-ceiling pantries on the other wall (replacing the bench and the wall cabs.)
But for now I’m just going to go ahead an be glad that most of the shit is up off the floor. Turns out installing 21 linear feet of shelving is actually a game-changer as far as life on the farm goes.
Article reference Wood & Pipe Wall Shelves for the Laundry Room
No comments:
Post a Comment