Yeah. That’s all I have to say about the 22 hours of counter-installation I did this past weekend. Holy. Shit.
Looking back on it, it’s funny to think that I was under the impression I was “really close” to being doing a week ago. (Ha.) I mean, I thought I had one cut straight cut left to do, trim the sink hole, join everything together, and that would be it. I was sure I’d have it done Saturday, with Sunday left for clean up.

That face says it all.
The awesome part about Saturday was that my mom came up to the farm to help out with odds and ends (and help me move pieces of counter around as needed) and it was SIXTY DEGREES OUT. In February. In MICHIGAN. (This is literally unheard of… as in it has never been this warm on that particular day in February in all of recorded history.)
That was such a blessing because not only was it just plain awesome to be outside, it also meant I could work on the counter right out on the porch instead of hauling all of the pieces in and out of the garage.
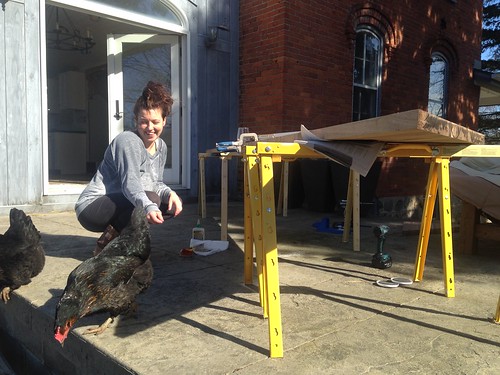
The chickens also thought this was an awesome arrangement.
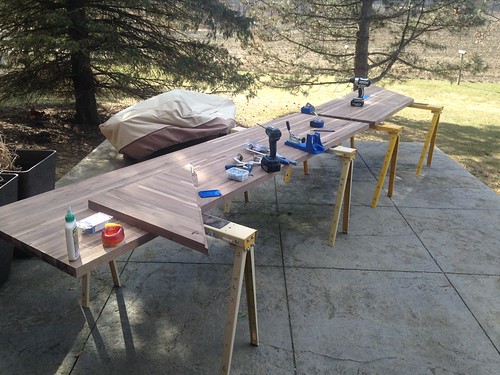
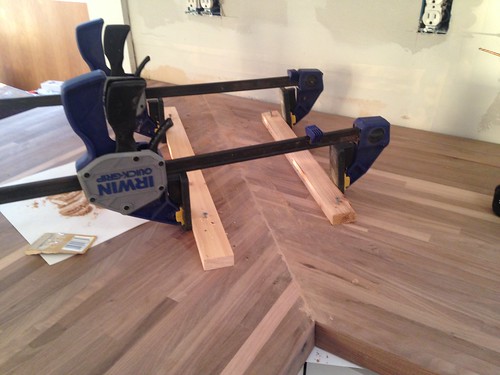
So the first challenge of the weekend was joining two sections of board together to make one fifteen foot long section. The sink hole is roughly in the middle of that section, and I debated for a long time about either putting the seam behind the sink (where it would be less noticeable) or just down somewhere near the end of the counter where it would run the full width of the counter.
I decided on putting it behind the sink… and I’m still debating on whether or not that was the right call, but it is what it is.
So, first step, glue these together…
Except I decided not to use the exact right tool for this job–a biscuit joiner–even though I’d already purchased one and was sitting in its box in the back of my car.
I don’t… I mean… guys. I’ve been doing this shit for over a decade. I know how this goes, and it is always, always harder and more frustrating if 1.) you don’t have the right tools, 2.) you don’t have good quality tools that can handle the job, and 3.) you don’t take the time to learn how to use those tools. I know this, like, intrinsically, deep down in the depths of my soul, and yet sometimes I still fall into the trap of not wanting to pay the money for the tool, or not wanting to take the time to figure out how to use it correctly, and guess what? That shit goes horribly wrong every time.
Here’s the conversation that happened between me and my mom to illustrate how this went down.
11:10 AM
Me: Mom, what time is it too early for happy hour to start on the farm again?
Mom: Well, the farm has special rules but we should probably wait until afternoon?
11:58AM – After the first failed glue-up attempt
Mom: Is it afternoon yet?
Me: Holy shit, close enough.
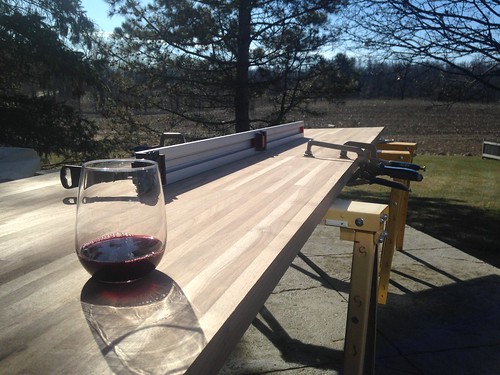
I did eventually manage to get the board glued up (and held in place with some clamps and pocket screws while the glue dried) and, in the meantime, my mom and I rode around on the golf cart and staked some of the cages around the fruit trees that had blown over recently….

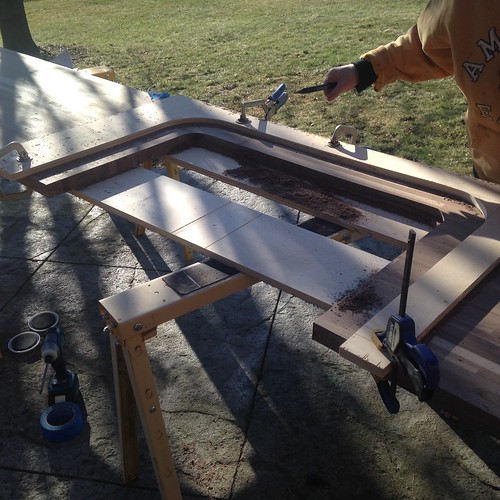
And then I got to work cutting out the template for the sink hole.
I’d already had enough success with a cobbled-together jig for the stove hole that I wasn’t super nervous about this, I just really wanted to do it right. (I actually started a template a week ago and it broke in half while I was cutting it, so this was my second attempt.)
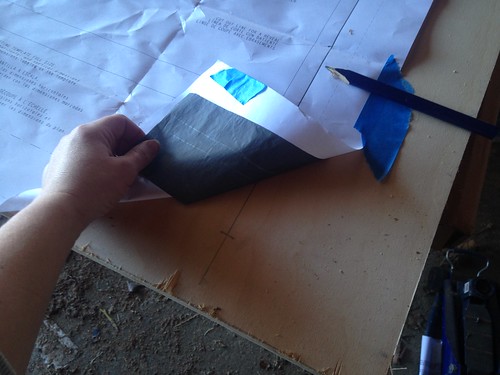
I know some people cut out the paper template (or glue the template directly to the board with a photomount spray) but I usually have a roll of graphite paper on hand, and I find that it’s the best way to transfer a template pattern without ruining the original. (You can get it for under $10 on Amazon… so worth it.)
With the original template transferred on to the board I then had to add 3-1/8″ to accommodate my my router guard (which was easier on the straight lines than on the radius corners.) I used to make sarcastic comments back in elementary school math classes about “never actually using this in real life.” Ha. I hope all my old math teachers get some satisfaction out of this…
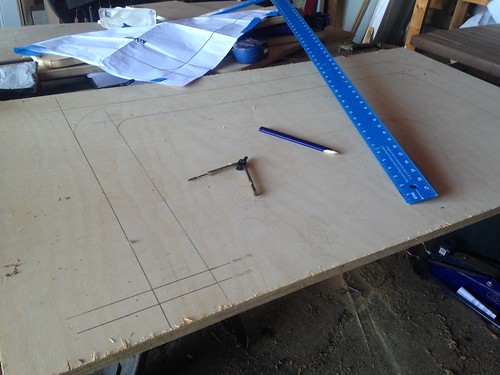
I used a scrap piece of plywood for the template and cut the two straight “sides” with the circular saw, and using a jigsaw for the curves. My very favorite part of this process was when I was debating how to cut the straight line that would end up behind the sink… the easiest thing would have been to continue cutting with the jigsaw, but I know from years of experience that won’t give me an actual straight line, so I said out loud to myself “I really should just make a plunge cut with the circular saw to do this right…” (Even though that’s not at all what I really wanted to do because I hate making plunge cuts with the circular saw.)
And my mom standing four feet behind me– doing something else entirely– was like, “WELL JUST DO IT THEN.”
I’m still laughing just typing that. It was exactly the thing I needed to hear, so I picked up the saw and got to it…
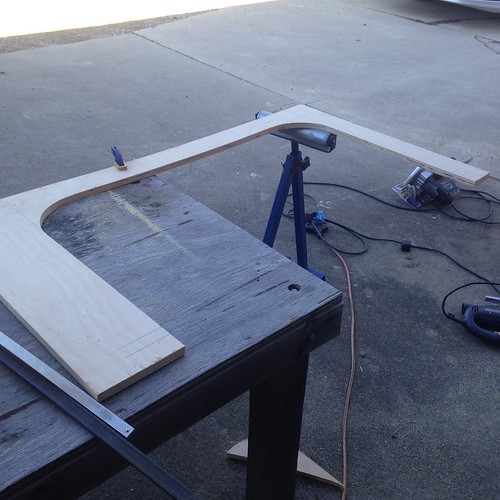
And ended up with a really good template.
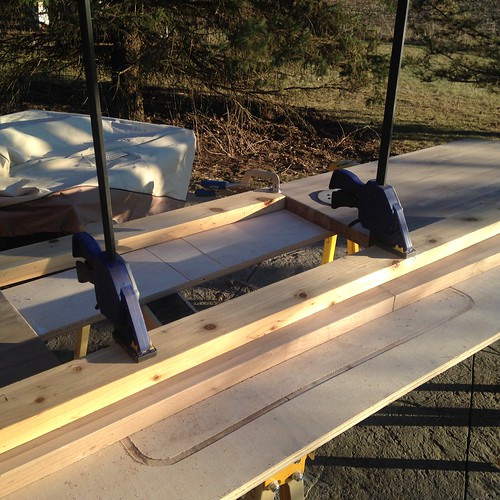
The next step, of course, was clamping this to the 15′ piece of counter and then using the router to cut it out, but there were a lot of challenges that came into play with this step as well.
The first was placement of the template. I spent a lot of time like this…
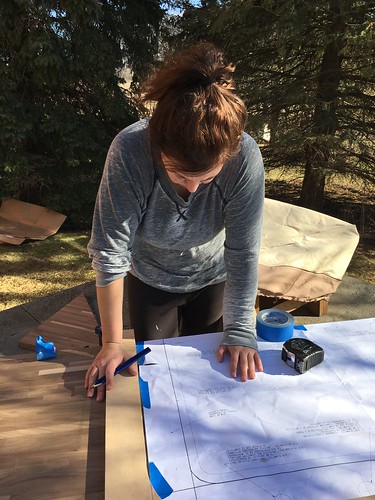
Because unlike most sinks that will be dropped in or mounted below a sink hole after it’s cut, my gazillion pound cast iron sink is already in place on a base in the cabinet. And also, nothing in my 160 year old house is square, so measuring from the only wall that was a viable measuring-point (and, of course, not square) left me with more questions than confidence in where the template should be placed.
At some point I gave up measuring, re-measuring, drinking more, and measuring again, and just said, “fuck it, I’m cutting this hole.”
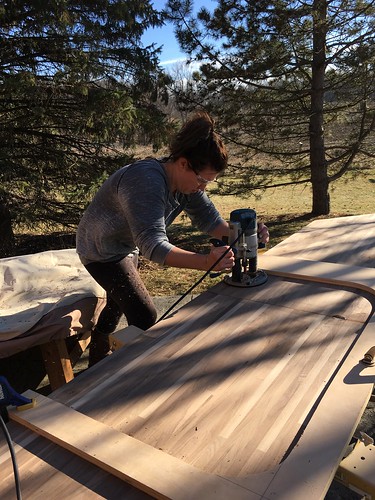
Like the stove top, I did multiple passes with the router (this time, four passes) and the cut turned out beautifully.
Of course, now I had a 15′ piece of butcher block with a bigass hole in it that was tenuously held together by some un-cured wood glue and a couple of undersized screws on a 5″ section of board.
In other words, moving this without breaking it was going to be a bitch.
I braced the shit out of both the joint and the board, and then my boyfriend came over and the three of us attempted to move the piece of counter in the kitchen.
And of course the glued seam cracked right before we got it in place. I was 50% livid and 50% resigned because I knew this was going to happen the moment I put that seam on the smallest section of wood behind the sink. But the real reason I was disappointed was because my sink hole was about 1/4″ off.
The cracked seam wasn’t so much of an issue as was the fact that I was potentially going to have to lift that 15′ piece of counter up again and move it outside to trim the hole to the right size AND join this board to shorter board that makes the “L” of the counter. I was sure that picking that piece up again would cause the screws that were in it (and unable to be removed in its current position) to crack and split the wood beyond repair.
I’d just like to take this time to point out that if I’d used the biscuit joiner that I currently owned and was sitting in its box in my car and had also just glued/clamped that section in my house and let it cure 24 hours, it would have been fine. All of my frustration at that point in time was due to 1.) not using the proper tool, and 2.) rushing the project and not taking the time to do things right.
Those are rookie mistakes, and there’s no excuse for them. I know better. But, you know, I’m still human… a particularly impatient one when I don’t have a working kitchen sink (which is weird because we all know I’m not in some huge rush to do my dishes, but still) and I did a lot of mental gymnastics on Saturday to convince myself that I didn’t have any other option but to make those less-than-stellar choices.
Listen, a lot of this stemmed from the fact that I am really bad at asking for help, and this was a particularly awkward situation where I really needed someone on-hand for 8-10 hours, but actually only really needed them for maybe 15 minutes of real work at random times throughout the day. Also I’m really easily distracted so when I’m doing a lot of measuring and holding numbers in my head– or just mentally planning out the next steps of a project– I can’t entertain or chat (or sometimes even talk civilly) to other people when I’m working. So basically I needed to ask someone to spend their whole day on the farm not talking to me except for the half a dozen random times I needed help lifting or moving a piece of counter? That’s awesome.
And it’s exactly what I asked my boyfriend to do the weekend prior (and he was super gracious about it) and then asked my mom to do Saturday (and she was also awesome about it), but come Saturday evening when I had an off-center sink hole, a cracked seam, and no help lined up for Sunday? I’m not going to claim that was one of my most shining moments as a human.
But…
I obsessed about it for the rest of the night, slept on it, woke up bright and early Sunday, and had nearly convinced myself to leave the off-center sink hole as is (I even posted about it to Facebook and very much appreciated all of the comments voting yea or nay on trying to fix it) and then I did a thing I almost never do mid-project and called my dad. This is how the conversation went:
Me: I don’t know if I should try to fix it or just leave it as is…
Dad: Fix it.
Me: …
Dad: I feel like you just want someone to give you permission not to fix it, but you need to do it.
Me: Okay, fair. But what if I fuck it up?
Dad: Honey… it’s already fucked up.
Ha. Dads. If I’d decided to call literally any other person in my life– any person– they would have told me to leave it, but I called my dad and I think it’s because subconsciously I wanted someone to call me on my shit and tell me to fix it. I mean, in the moment I was like 45 seconds away from an emotional breakdown, but after I talked to him I was like, well, yeah, that’s exactly what I needed to hear, and now how the fuck am I going to fix this by myself?
I had two choices: 1.) Use the router to make the sink hole bigger on one side, or 2.) Use the circular saw to trim a 1/4″ off the end of the counter and shift the whole thing over.
I decided the second option was going to be easier and less risky, but it was also going to create some complications for the 45-degree cuts I’d already made for the L shaped part of the counter. Also, I had to just mentally get over the fact that I didn’t want to cut in the kitchen and create a shit-ton of sawdust inside the house, because no way I was going to be able to move that 15′ counter out of the house by myself.
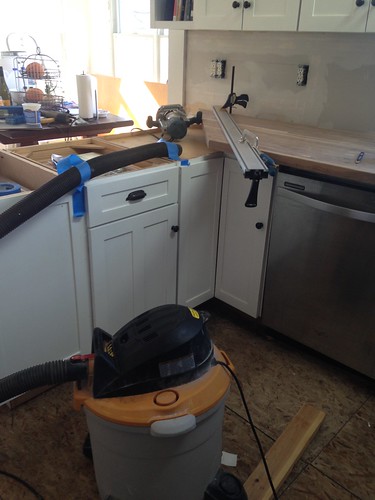
So I did what any reasonable person would do at a time like this, and taped my shopvac hose to my counters and basically cut the boards in place on top of my cabinets…
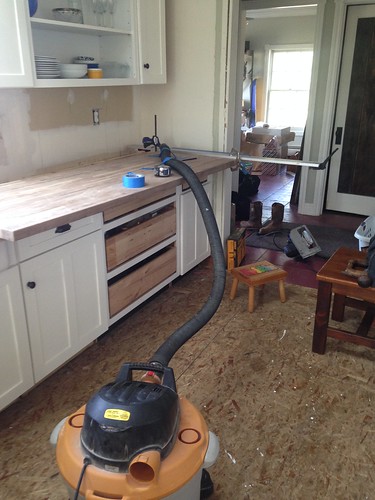
(I managed to get some plywood under them so I wasn’t cutting directly on top of the cabs.)
Which– holy shit– actually worked!
Then I had a little more confidence to tackle the issue with the 45’s I’d just created, and I’m telling you, I basically winged it. I was able to move the 6′ piece of counter in and out of the house, and I had to trim 3 sides of it to make it work. And, even then, the 45’s I’d cut (and recut) with the circular saw weren’t fitting tightly. But at this point I was actually super confident in my ability to cut and use the router “in place” without damaging anything, so I trimmed 1/16 of an inch off the angles to square everything up.
Earlier in the day my dad bragged about his router with the attached dust collection system and asked why mine didn’t have one (and the answer is because I stole this router from him ten years ago, obviously, so it’s way older than his) but his fancy newer model has nothing on my shopvac/painters tape dust collection system…
This is what happened…
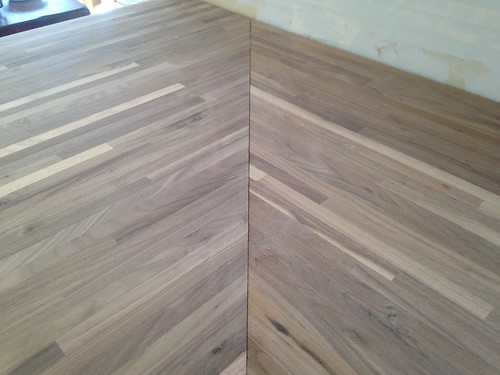
Holy shit, you guys, do you see that fit?
There was maybe 1/16″ gap between those boards, where there’d been 1/4″ or more before. I know in my last post I said I didn’t love using the router to trim up those straight cuts, but I very much changed my mind.
Okay, so there was only really one big challenge left at this point. I needed to attach the 15′ piece of counter (with a cracked seam) to this shorter piece to make the L, and in my mind that had to be done from underneath, either with pocket screws or some temporary boards screwed in to brace the clamps with. But that would also mean somehow lifting up both sections of board and then attaching them and then putting them back in place 1.) by myself, and 2.) without breaking anything.
And then I realized I was being an idiot.
Well, not as big of an idiot as I’d been about other things in this process, but I was stuck on this idea that I had to attach the boards from underneath. Just like earlier in the day I was stuck on the idea that I had to move the counters out of the house to cut them.
Those are actually not real obstacles.
This time, I’m happy to say, I learned my lesson. I broke out my newest tool–the biscuit joiner– and made some practice cuts.
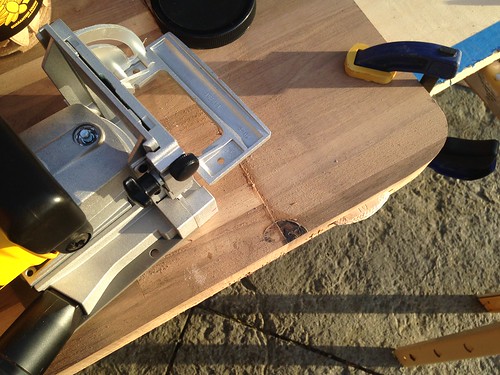
Then I made the actual cuts in my two counter pieces, glued them together, and…
I screwed two boards right into the fucking top of those things to clamp it together.
Yeah, you might be horrified by that (I kind of was) but I realized that the only thing keeping me from getting the counters finished was four tiny screw holes that could easily be filled with some wood filler. So I screwed those bitches in and then, using another tip from my dad, and just emptied some of the sawdust out of the sander I’d been using on the counters…

And mixed it in with with the wood glue that was compressed out of the seam, to make my own wood filler.
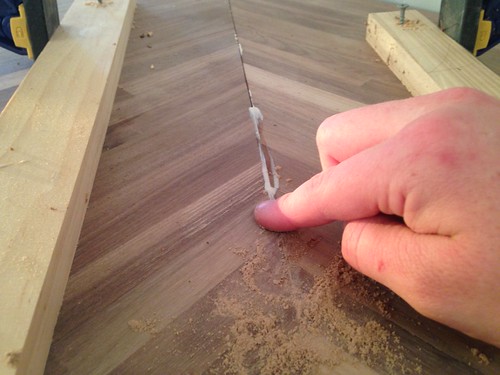
Which worked fucking beautifully. I also used it on the screw holes once I removed those blocks for clamping and on the seam behind the sink.
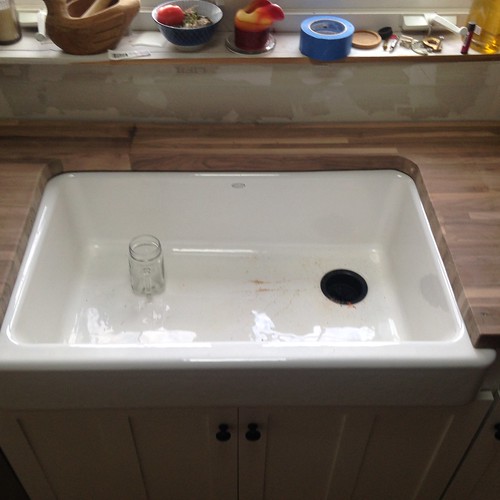
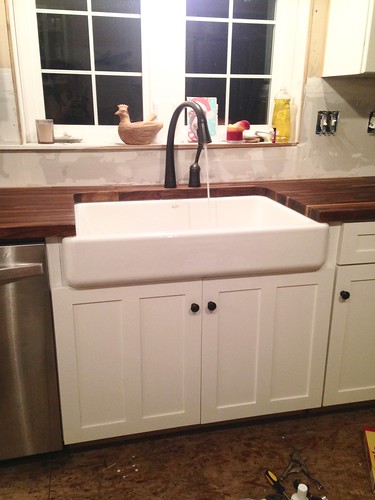
I also drilled the holes for the faucet…
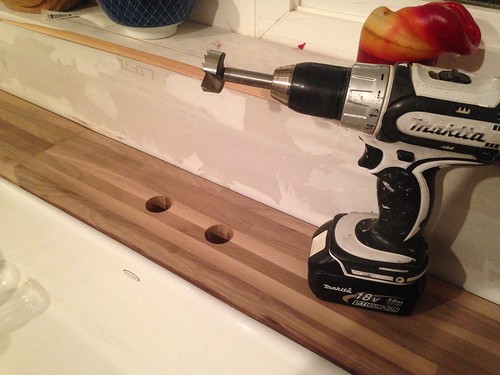
(That’s a new 1-3/8″ forstner bit I bought specifically for this job, and it worked beautifully.)
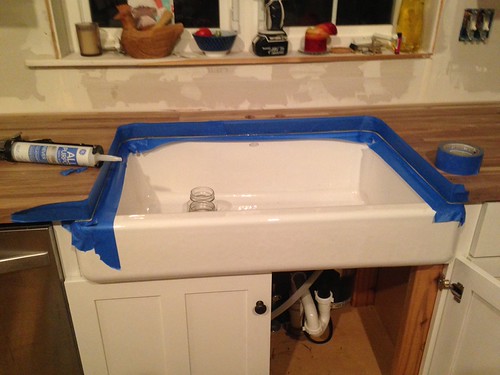
And caulked along the sink…
And then, then, late Sunday night, after a 14 hour day working by myself on these counters, I finally put the first coat of oil on them and…
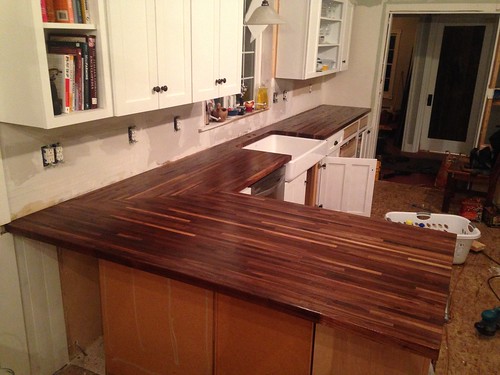
HOLY. SHIT.
Holy shit. Holy shit. Holy shit.
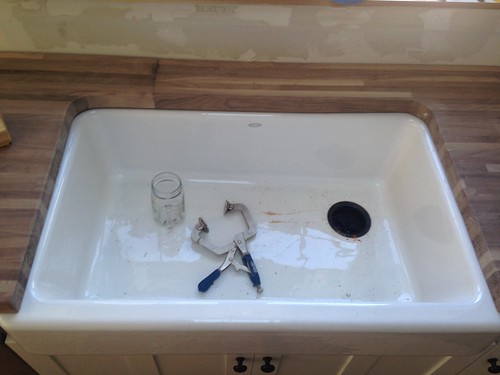
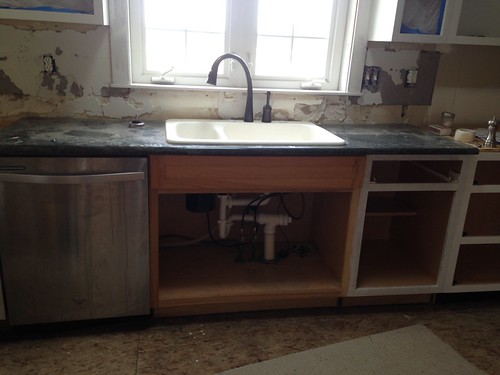
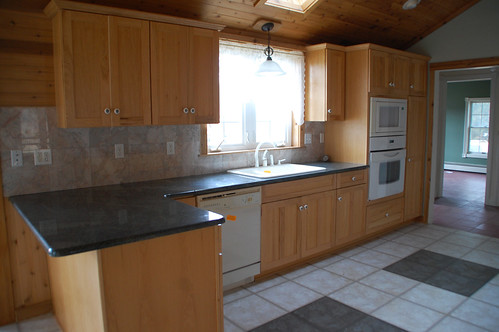
Remember what it used to look like?
I’ve been continuing to oil the counters every night this week, and it’s just now starting to look like a functional kitchen again…
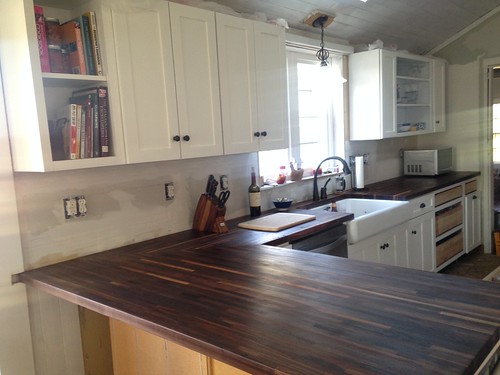
Still pretty far from being done, but it’s looking just a little different than it did on the day I bought this place five years ago.
I’m really happy about all the decisions I’ve made so far, from removing the pantry and wall oven, to painting everything white, extending the bar area another foot, and adding that little bookshelf. And definitely– even though they were a pain in the ass to install– those beautiful walnut counters.
It certainly wasn’t the hardest thing I’ve ever done, but it’s definitely the most difficult thing I’ve done in a while. And the challenge of it reminded me of things I might have been taking for granted, like how to do things correctly (don’t rush and always use the right tools), and what great advice both of my parents give when I’m least expecting it (and definitely don’t think I’m asking for it), and, frankly, that there’s always a way to solve the problem. Sometimes you have to be willing to modify, adjust expectations, cover your kitchen in sawdust, and drill right into the top of that beautiful fucking counter, but, by god, you can do the damn thing.
If nothing else, this counter will always be a beautiful reminder of that.
And now, I need to go sleep for a week and let all of my muscles heal. Because, holy shit.
Article reference Kitchen Process: The Holy Shit Edition
No comments:
Post a Comment