Progress on the upstairs bathroom is– and this is a phrase I haven’t used in conjunction with progress around the house in a long time– coming along nicely
I mean, to be honest, there is nothing nice about it… this bathroom is coming along like a gigantic pain in my ass, but it is coming along, and that’s the important part.
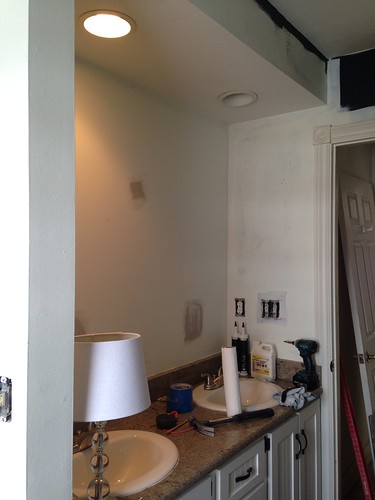
There have been some easy wins over the last week. I mean, I spent last Friday night inside the tub with a beer and caulk gun…

By the end of the night the tub was water-tight and I started giving some serious thought to having a working shower in this bathroom, which meant dealing with the unfinished plumbing.
Three years ago when I bought the tub (and, again, assumed this was going to be a 3 weekend project) I also bought the Delta Addison tub and shower trim kit. It came with a tub spout connector that needs to be soldered to the copper stub-out the plumbers left…

I’m mediocre at sweating pipes. Like, I can do it, but I don’t want to do it within an inch of the new surround tile with zero margin for error. Right? I’m crazy, but not I-want-to-accidentally-burn-my-house-down crazy.
Here’s how I know the idea of finishing this plumbing was stressing me out…
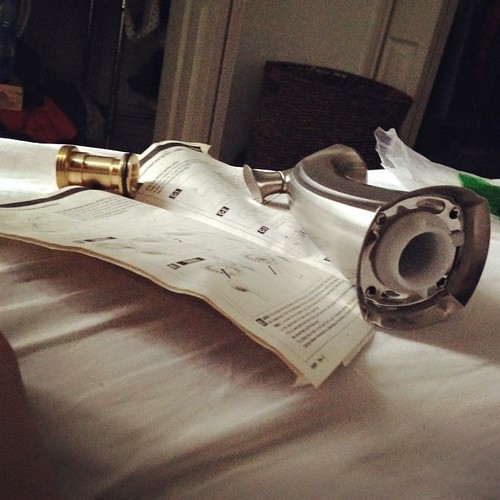
I woke up Saturday morning with plumbing parts in my bed.
Apparently I had a burning plumbing question at 3AM that had to be answered right then.
Also, Saturday morning I got an Amazon notification that a new coupling with a set-screw (that doesn’t need to be soldered on) had been shipped. Apparently 3AM me is very resourceful and good at problem solving.
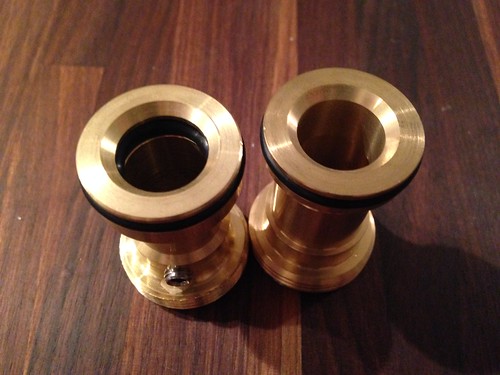
The new coupling cost $7. So, two years ago when I had a working tub upstairs and thought I needed to bring the plumber back to install this coupling… turns out I just needed a small bout of insomnia, a $7 part, and to stop being such a wuss and start thinking about other ways to solve a problem.
Story of my life, guys.
Here’s how the install went…
I did a dry-fit first, and then cut the stub out down to size using a copper tube cutter (they’re fairly cheap, easy to use, and you can find them at most hardware stores.)

Then, put the coupling on, and tightened down the set screw…
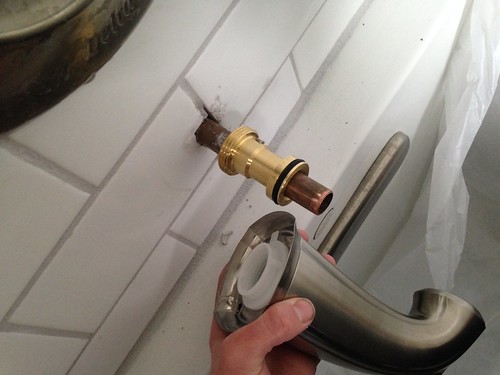
And then screwed the tub spout on…
Yep. Took all of 3 minutes.
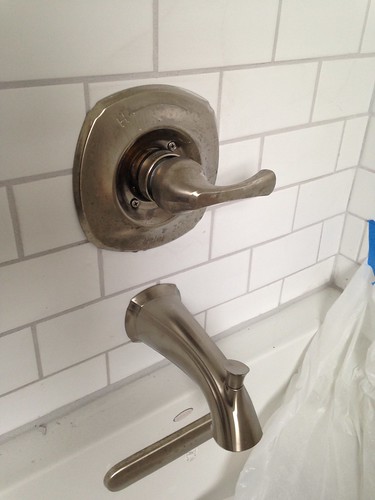
After the drywall patches were finished above the shower I also installed the shower head (which was just screwed in with a little Teflon tape.) And then, for the first time in 3 years, had a working shower upstairs….

And not just a working shower, but, an amazing shower. This house has mediocre water pressure, and I thought that until I fixed that (sometime in the next 20 years) it was just going to be mediocre showers from here on out, but turns out all I needed was a really good shower head.
This one is like an effing massage. (And that’s not sponsored in any way, just the gods honest truth.)
Which is all to say, my mom was right. Having this bathroom mostly functional has drastically improved my quality of life.
But, as with all good things, it did not come without a fight. And in my case that fight was with every single one of the five– yes five– separate light fixtures in this bathroom.
There’s the one that used to be in the closet I tore out, and worked briefly 3 years ago before all of the sudden dying… (Currently I’m getting no power to the switch, and have no idea why.)
Then there’s the two can lights I tried to retrofit a few years ago, but the trim doesn’t fit quite right (because why would it?)
Oh, and this thing above the shower.
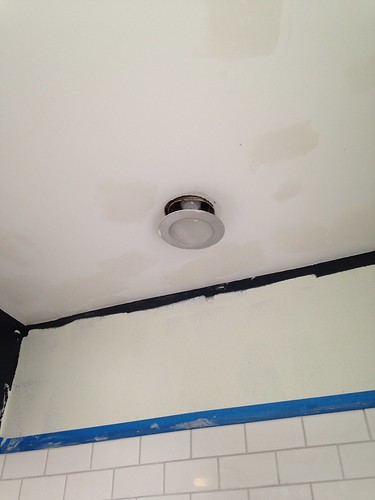
I can’t even.
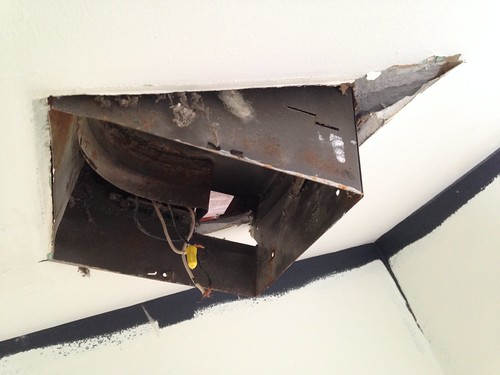
But the worst of all of them is this fan over the toilet.
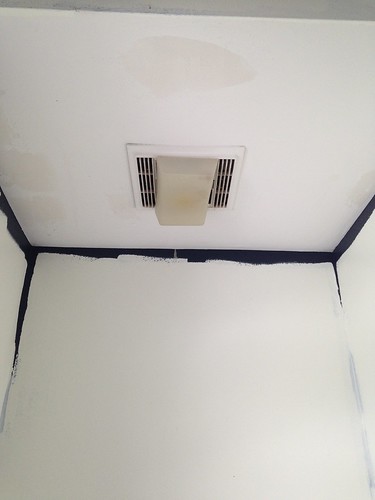
The light hasn’t worked for the entirety of the time I’ve lived here, and just about nothing could compel me to take the cover off that light because I’ve been traumatized by getting a facefull of desiccated japanese beetles one too many times while trying to change light fixtures in this house.
Note: They taste worse than they smell.
Ugh.
But there was no way I was going to have a fully remodeled bathroom and still have that ugly fan over the toilet, so I got to it… and, first of all? There was a (luckily abandoned) wasp nest in there…
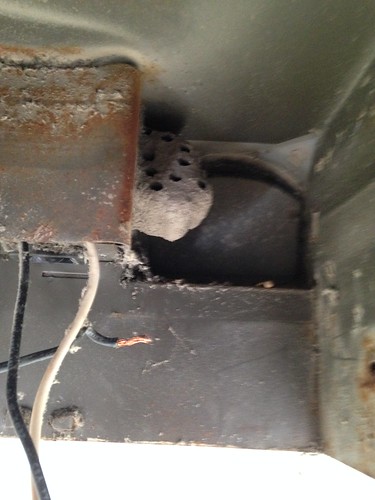
Wasps nest notwithstanding, removing the old box from the ceiling was a maddening affair. I have access to the attic so I thought this would be no big deal, but that particular part of the attic had decking installed with nails. So instead of being able to un-screw the OSB to access the fan box I had to haul two saws up to the attic to cut a hole in it.
Then I realized that because of the large space between the floors of my house and the fact the that fan was in a soffit, the box was a solid 18″ below the floor of the attic (i.e. only accessible if I laid on the floor and reached down as far as I could while my face was smashed up against a pile of what was most likely mouse poop. I don’t want to talk about it.)
After maybe 30 minutes of trying to locate the screws and/or pry the box loose I realize it had actually been NAILED into the soffit framing. Nailed. Why.
It’s been a long time since I’ve truly lost my shit in the middle of a project, so I will just say this: I only managed to remove that fan box with the liberal use of my hammer and every single swear word I know.
And, of course, in the process, tore a nice big chunk of drywall out of the ceiling that I’d just finished patching and sanding BECAUSE THIS PROJECT WILL NEVER END.
All the swear words, you guys. All of them.
But finally, finally, I got the new box up, installed the fan and the light, Flipped the switch, aaaaaand…
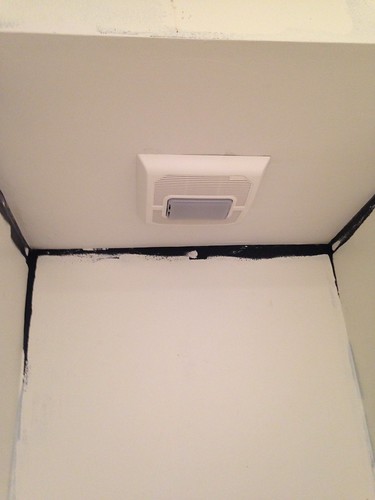
The light didn’t come on.
You know how this goes… take it all apart, put it all back together again, remain convinced that there will never ever be a working light fixture in this bathroom, and then, after several hours and all the new and creative ways I could combine four-letter words, I finally got the fan AND the light to turn on.
Whew.
At this point I thought it would be smooth sailing… just replace the old fixture above the shower with a new LED retrofit can light. These things are super easy to install. You just screw an adapter into the light socket, push the light up into the can, and voila! New can light. It’s as easy as changing a light bulb.
Except in my house, of course. Because the “can” wasn’t a standard 4″ can OR a standard 5″ can. It’s 4.5″. Because why not?
After some finagling I figured out how to use a 5″ retrofit LED can light (which, yes, I happened to have on hand because I hoard house-parts, apparently) but it was a pretty tight fit, and I may have been less than gentle trying to get the trim to fit into the can, and the next thing I know…

Yeah, cut a wire, popped a breaker, and for the life of me could not get the power to turn back on to this room.
If you need me, I’ll just be sitting up here in the dark for the next eternity.
Ugh. Fine. I did not sit in the dark for all eternity. I eventually stopped whining, reset all the GFI outlets and the breaker, and eventually ended up here:
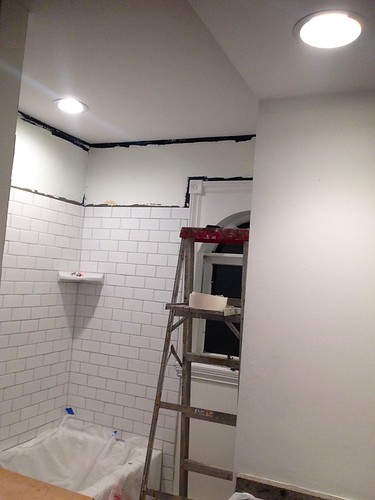
It’s like the skies parted, the heavens opened up, and angels started singing. Also, 4 of the 5 lights turned on.
So for about a week I had one of the most well-lit bathrooms in the history of modern electricity… and then we got hit with an early-March snowstorm.

Which knocked out the power to the house for the last 3 days.

I mean, I’m sure the universe isn’t actually out to get me, but you know it’s also definitely getting a few laughs at my expense right now.
Here’s the good news though (other than the fact that I own a generator, which is very, very good news after 72 hours without power) the progress may be a pain in the ass, but it is coming along:
Tear out closet and patch drywallRe-face cabinetsLevel, tile, and grout floorTile tub surroundPatch ceilingMove outlets and patch all drywallReplace plumbing and install toiletCaulk tuband toiletPaint radiatorPaint ceiling and touch-up walls- Install baseboard
Install new light fixtures and switches- Add cabinet “feet”
Finish tub plumbing for working shower- Get and hang mirrors
- Get hutch for storage
- Install shelving, towel racks, etc.
- Paint and re-hang door with new hardware
Another couple of weekends and it might actually be finished.
Article reference Upstairs Bath: Finish Work and All The Swears
No comments:
Post a Comment