If you’re wondering which claddings will work best for your timber frame build, here’s the short answer: they can all be a good fit. But that’s not the whole story.
The fact is, some finishes complement the qualities of a timber construction better than others.
A big attraction of this structural system is that, once work starts on site, you can expect the weathertight shell of your home to be up and ready in as little as five to 10 days.
At this point, first fix work can proceed inside and out – so whilst the plumber is busily working away on getting the pipework network in place, the external roof and wall finishes can be applied, too.
Using a factory-manufactured structural system also means you can achieve good energy performance within a relatively thin wall profile.
According to Kingspan Timber Solutions, to get to a U-value of 0.17 W/m2K (a fairly typical level to aim at on a self build project), you’d need a wall profile of 435mm with standard masonry.
Located
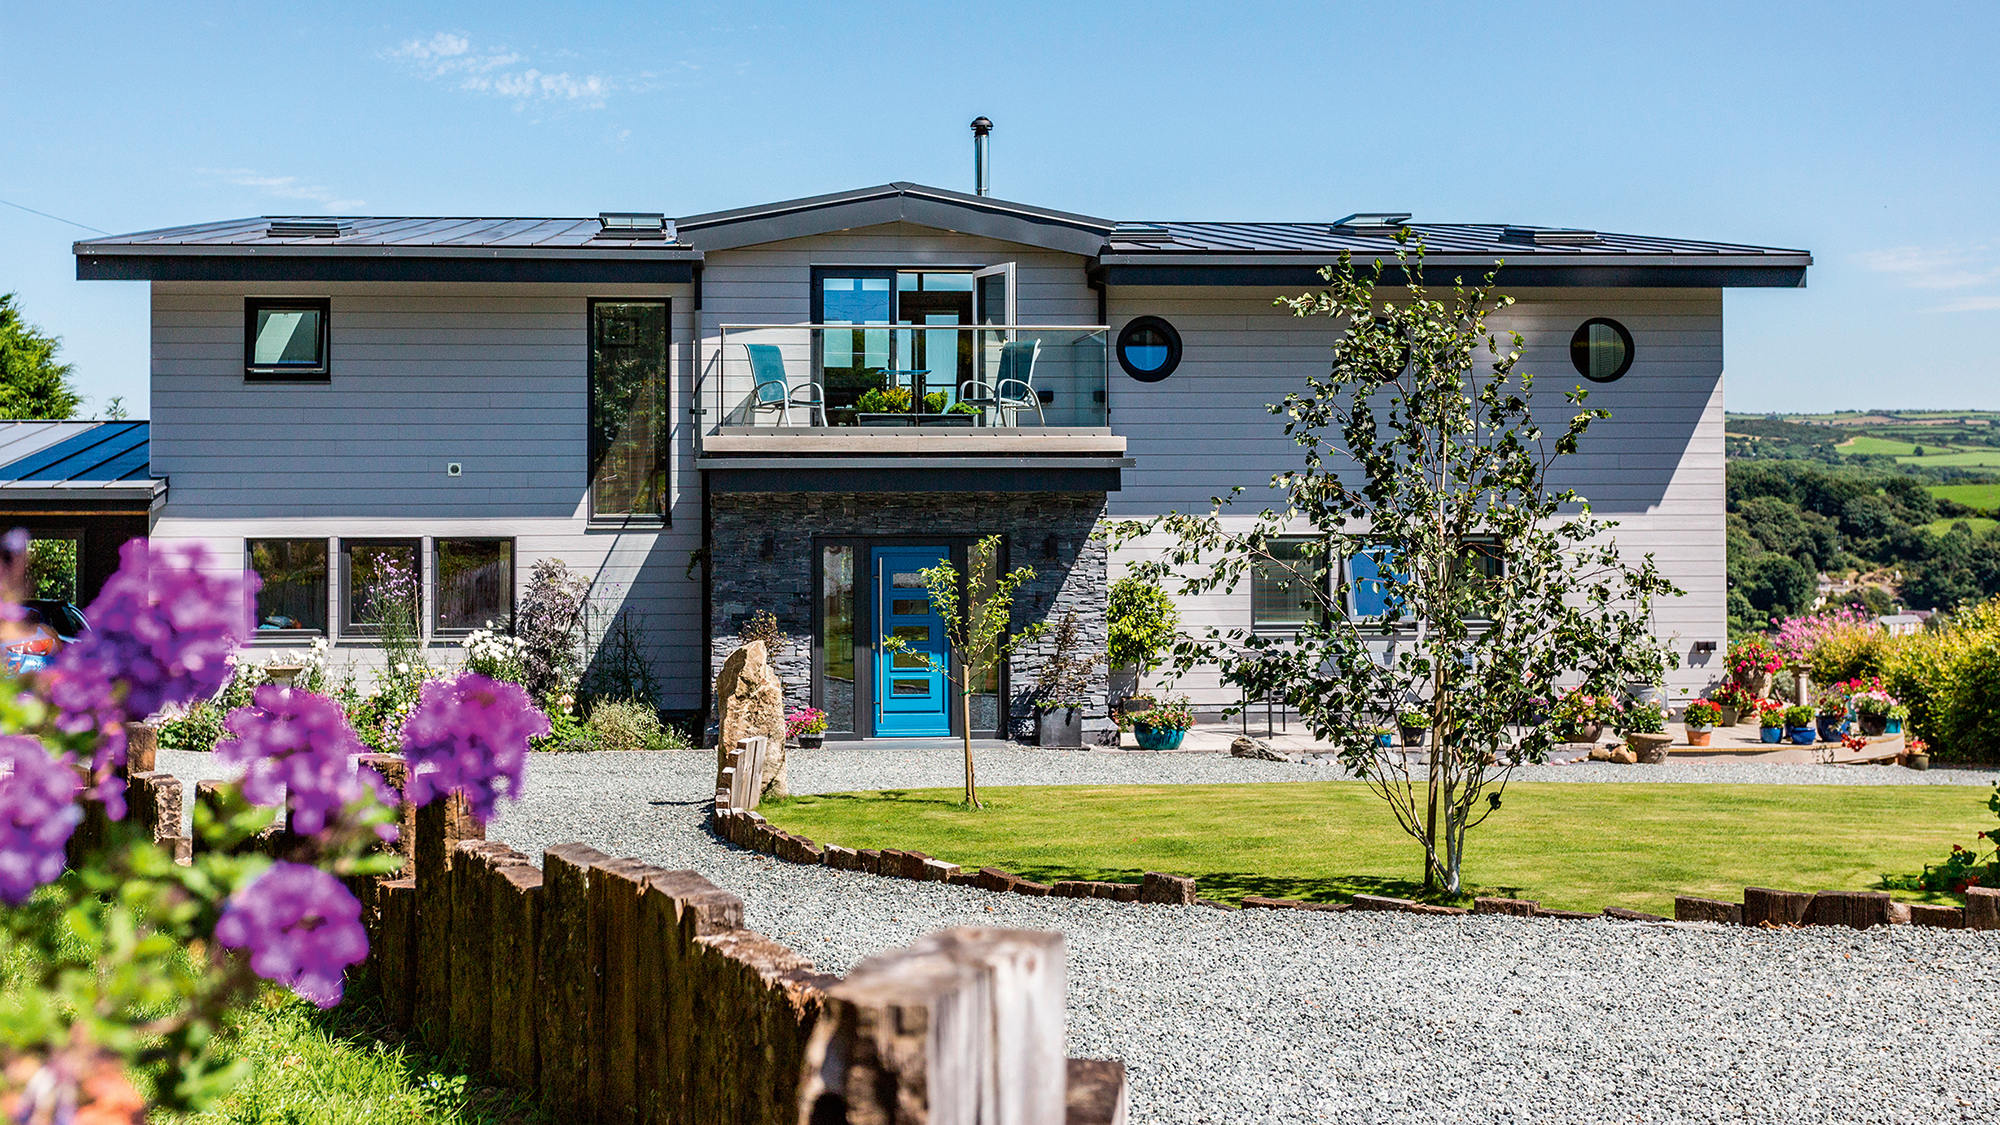
on the North Wales coast, this timber frame by Scandia-Hus features Marley Eternit’s Cedral Click fibre-cement cladding – a low-maintenance option for the seaside setting
Using a high-performance timber frame, you can achieve that with a wall thickness of just 312mm. That could translate to more floor space inside the finished property.
Your choice of cladding can help to accentuate these benefits.
Lightweight cladding
“These days, three out of every four timber frame builds we work on is probably finished in a lightweight system,” says Simon Orrells from Frame Technologies.
Wooden weatherboarding is a classic choice, but you can also consider products such as fibre-cement, render boards and brick slips (slithers of masonry cut from the block or extruded as tiles).
All of these options are quick to install and require minimal wall build-up.
“Pre-finished versions are becoming more popular,” says Simon. “Fibre-cement offers improved fire protection compared to timber, for instance – but it’s not any more expensive once you’ve accounted for the upfront cost, sundries and treatment required for wood cladding.”
How are lightweight claddings fixed?
The basic premise is similar across pretty much all the options – from render panels to fibre-cement boards.
From inside to out, the walling profile goes: timber frame panel; vapour barrier (which is sometimes known as a breathable membrane); battens; backing board (if applicable); and final finish (eg wood cladding).
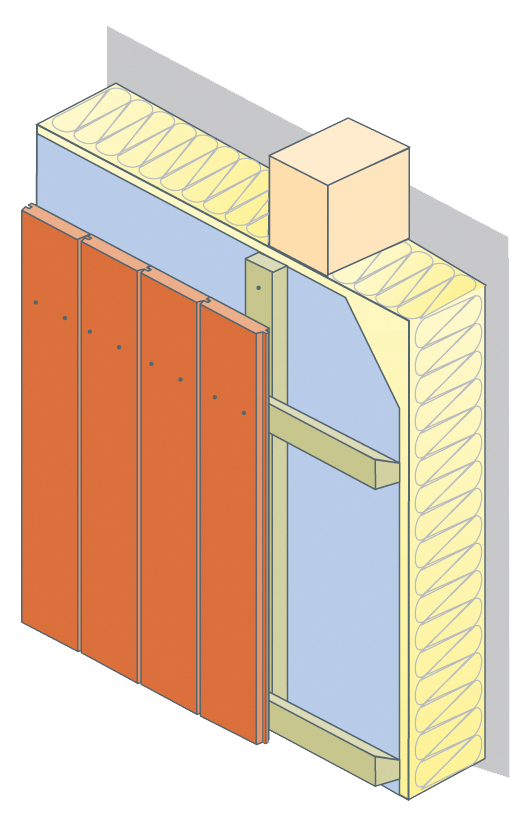
This illustration from the Timber Decking & Cladding Association shows cross-battening being used to fix vertical tongue-and-groove wood boards
The battens – typically wood, though some systems use metal brackets – are vital for creating a cavity, in order to ensure that there’s sufficient airflow between the external finish and the
main structural frame.
This means any moisture that penetrates is evaporated away before it can do any damage to the building fabric.
According to the Timber Decking & Cladding Association, for wood cladding, a standard ventilation gap would be at least 21mm – but the exact spec will depend on the product you’ve chosen and your manufacturer’s installation instructions.
Read more: Timber Cladding Options Explained
For the firm’s fibre-cement Cedral boards, Marley Eternit recommends a minimum 30mm airgap (it suggests using 38mm-deep battens).
Products such as Euroform’s Rendaboard are usually installed with a 50mm cavity.
A standard detail is to use a single layer of vertical battens to achieve the required cavity when attaching horizontal cladding – but Simon advises even greater prudence.
“Best practice is to double-batten to be certain you’re going to get enough cross-flow ventilation,” he says. “If you only use a single batten and the airflow gets blocked somehow – for instance at the bottom of the cladding – then you’ll get stale air in the cavity).”
The battens are typically attached at 600mm centres, although this may be altered depending on the location of your project (ie how exposed the site or elevation is to wind and rain) and the exact material used.
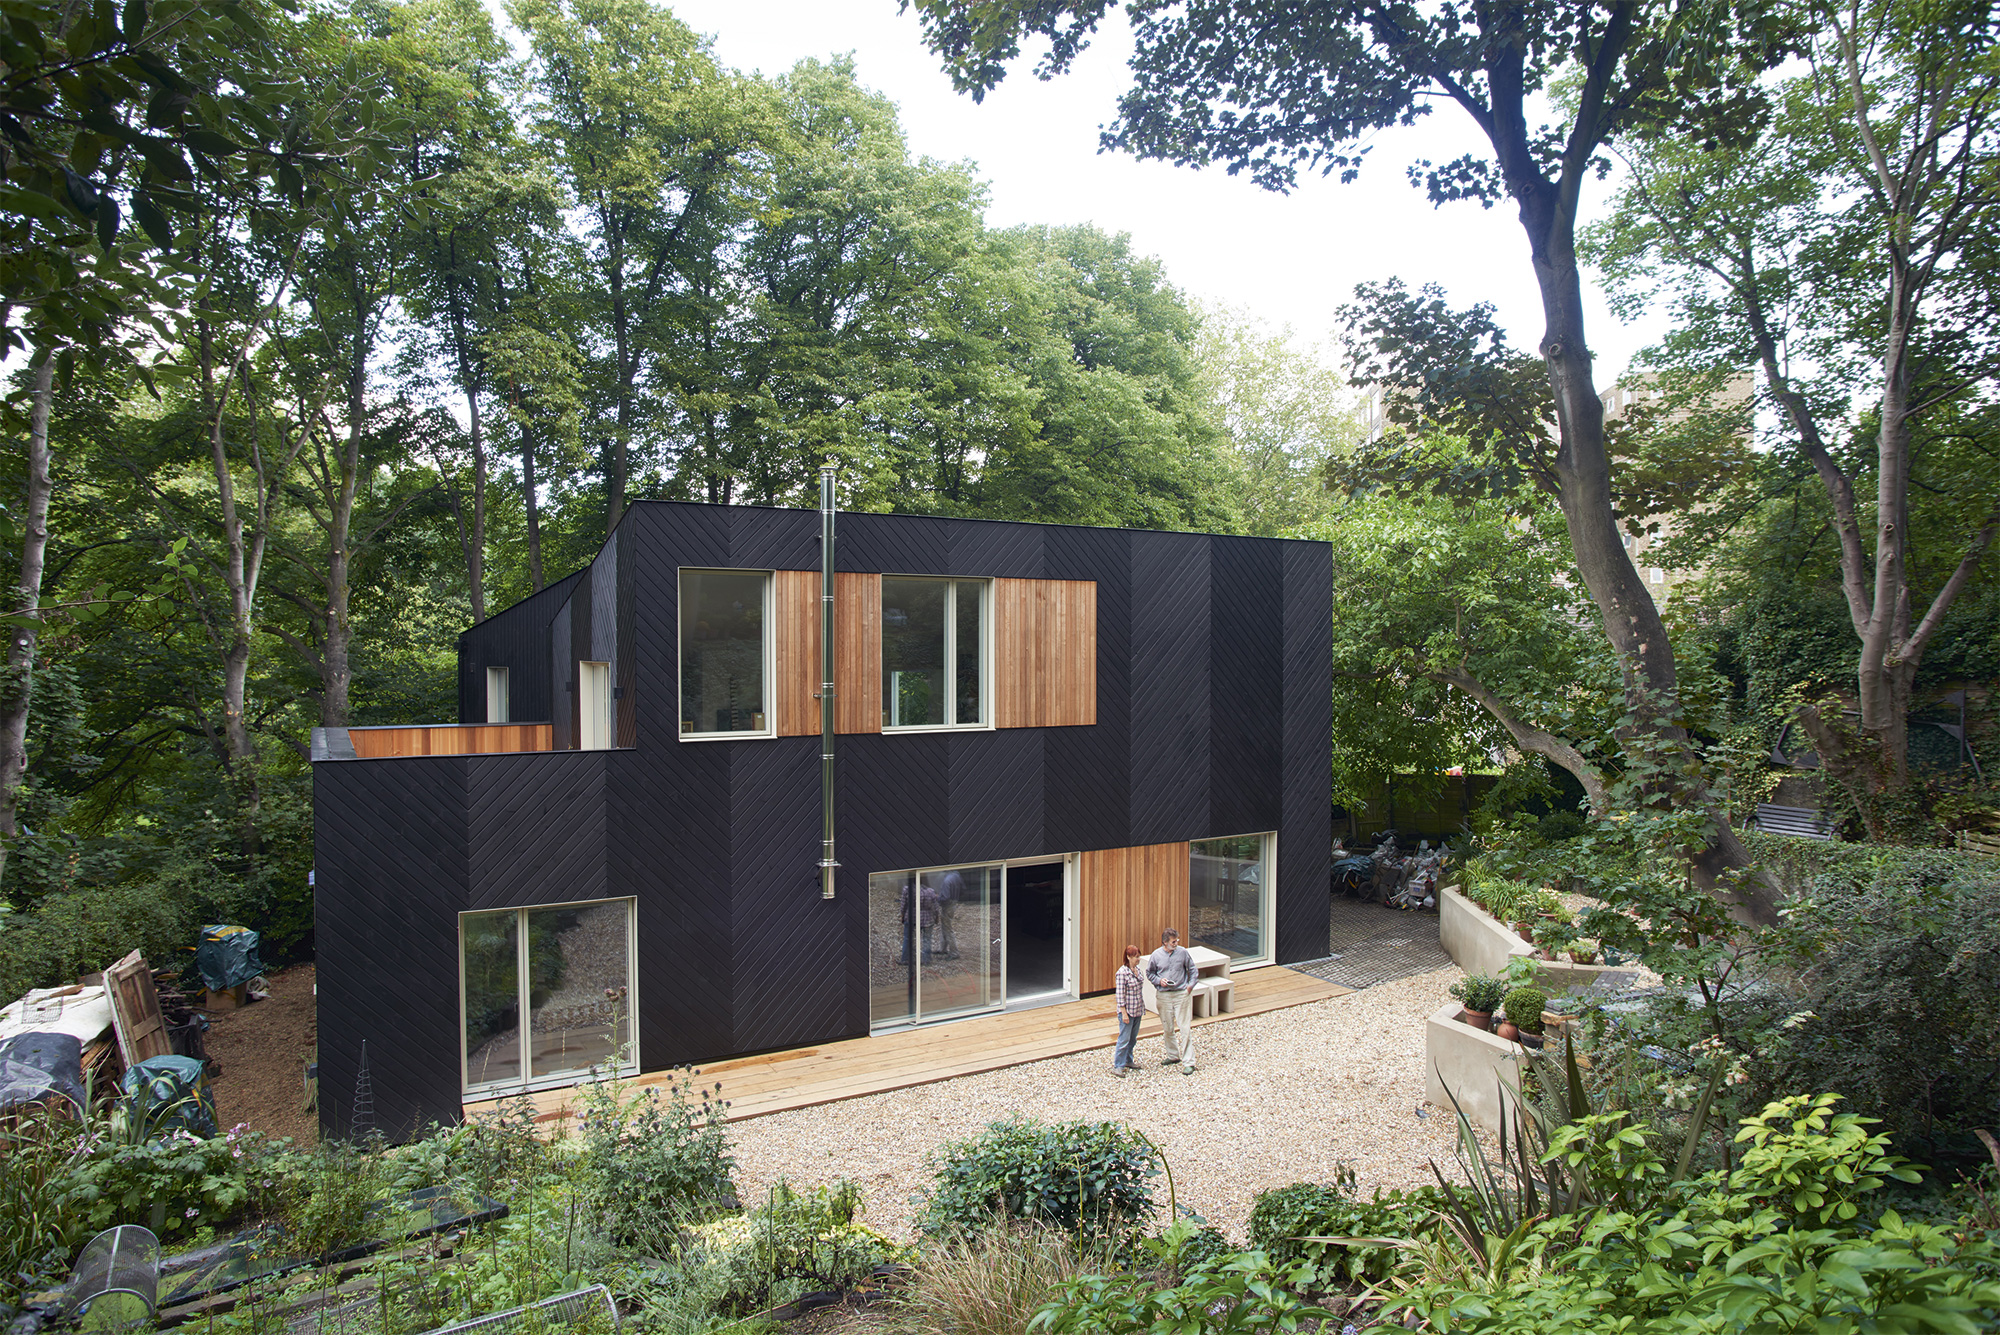
This timber frame home, designed and built by Facit Homes, is clad in timber rain screen coated in a dark stain
Green oak cladding, for instance, is likely to move a lot – so the battens might need to be positioned closer together to minimise this.
Timber and wood-effect claddings are usually nailed or screwed using corrosion-resistant galvanised or stainless steel fixings.
Note that wherever you’re using a horizontal batten, this should be chamfered so that the water is directed away from the structural fabric (ie back towards the cladding in the case of a single batten, or into the centre of the cavity if you’re using cross-battening).
Around windows and doors, special trims will be needed, and potentially an insect mesh
(also known as a perforated closure).
One thing that differs slightly is how you purchase the cladding.
The post Cladding a Timber Frame Home appeared first on Build It.
Article reference Cladding a Timber Frame Home
No comments:
Post a Comment